|
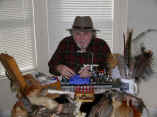
Fly of the Month Bob Ireton brings together his experience in fly fishing, aquatic entomology, and knowledge of fly tying techniques and materials, to design and tie durable and effective flies. |
|
![]()
Volume 4, Issue 4
April 2003
![]()
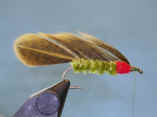
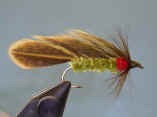
OLIVE MATUKA
Text, Fly, and Photography by Bob Ireton
The Matuka streamers originated in New Zealand. They started out as big baitfish imitations in the larger sizes of 2-6, and were introduced to North America through Fly Fishing Strategy by Swisher and Richards, published in 1975. They proved to be a successful fly, especially for trout, and are now in use everywhere.
The most distinctive feature of the Matuka is, of coarse, the wing. Being connected to the top of the hook and body material, the combination suggests the profile of a small baitfish. The feather seldom fouls in the hook, where a conventional streamer wing does this on a regular basis.
By tying this fly pattern using different materials and hook sizes, you should be able to imitate a baitfish that will catch most fish, small, large, and anything in between.
MATERIALS
Hook - TMC 5263, Dai-Rikki 710,
Daiichi 1720, Mustad 9672, Orvis 1526, or
equivalent.
Size - 2-12
Thread - Black, 6/0.
Rib - Fine copper wire or oval tinsel.
Body - Olive chenille.
Gills - Red chenille, dubbing, or equivalent.
Wing - Olive hen grizzly saddle hackles, 2 or 4.
Hackle - Olive grizzly hackle.
TYING STEPS
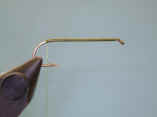
| 1 - Pinch down barb, if desired. On larger size hooks, it is possible to roll over the barb point to protect the fish, but still leave a small bump where the barb was located, to help hold the fish without damage. You can see this in the picture. Now place the hook properly in the vice. Attach thread behind hook eye, and lay on a base rearward, stopping above the barb. Tie a half hitch. | |
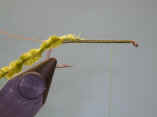
| 2 - Tie in the ribbing and the chenille for the body. Tie a half hitch. Bring the thread forward, stopping approximately 1/5 hook shank length behind hook eye. | |
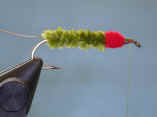
| 3 - Palmer the chenille forward to form the body. Stop
at the 4/5 shank location, tie in, trim the tag, and tie a half hitch.
Tie in the gill material, and form the gill area. Secure the gill
material, trim the tag, and tie a half hitch.
|
|
|
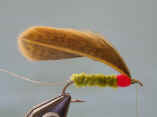
4 -Now take a matching pair, or two, if desired, of the feathers for the wing. Hold them 'cupped' together, and place them over the hook. Let the tips of the feathers extend past the end of the hook bend a distance of 1/2 the hook shank length. On the underside of the feathers, part the fibers where the body begins, and remove the fibers from this location forward toward the hook eye. Keeping the feathers in this position, tie in the feather shafts in front of the gills, trim the feather shaft tag ends, and tie a half hitch. |
|
|
5 - With the bodkin tip, part the feather fibers at the hook bend end of the body, and bind down the feathers with a wrap of the ribbing between the feather fibers. As long as you keep tension on the ribbing to keep the feathers secured, you can release the feathers. Continue to part the feather fibers, and winding the ribbing forward till it reaches the front or the body. Secure the rib, trim the tag end, and tie a half hitch. |
|
|
6 - Prepare the hackle for the collar, and tie in. Palmer several wraps of the hackle, and tie off. Trim tag end, and form the head. Tie a half hitch, then a whip finish, and cut off working thread. Add head cement . If necessary, stroke the wing feather to realign the feather fibers. |
![]()
Copyright © 1998 - thisyear The Buckeye United Fly Fishers, Inc. Cincinnati, OH 45242
The Buckeye United Fly Fishers, Inc is a non-profit corporation organized under section 501(c)(3) of the Internal Revenue Code, incorporated in the State of Ohio for the preservation, conservation and wise use of our fishing waters and game fish; and to assist in the protection and improvement of our natural resources
